byline

Paper models, photos and musings of a Paper Kosmonaut

24 December 2015

N1 1/96 [1] - The big bad rocket that would but couldn't

Oh yes. I started building the 1/96th version of the big N-1, Soviet Russia's answer to the Saturn 5. A couple of years back I did the smaller 1/144 version of the same rocket and I was so tired after making the 1st stage, I put it away for I think it was a year or so. Let's hope this won't take that long.
Around the same time, I was not yet equipped with an A3-printer and the 1/96th version was high up on my list, so I made a good A3 copy of it in the local copy shop. 200+ gram paper, so in other words, very heavy, and a nice gloss all over.
It was in storage for years but after the Ariane I wanted to do a nice "out-of-the-box" model, although in paper modeling we hardly have any models coming in boxes.

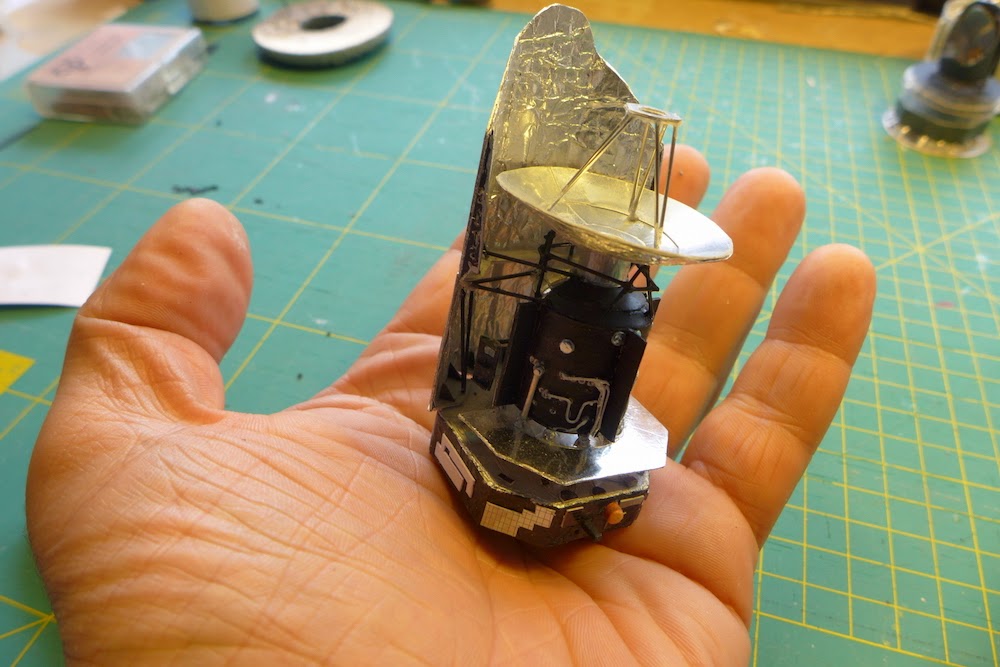
Anyways, I am not yet finished with the first stage, or rather, Blok A, but I thought it would be a nice seasonal present to get you all up to steam with what I am doing at the moment.

For a change this is going to be another one of those looooooooong posts, with lots of photos.
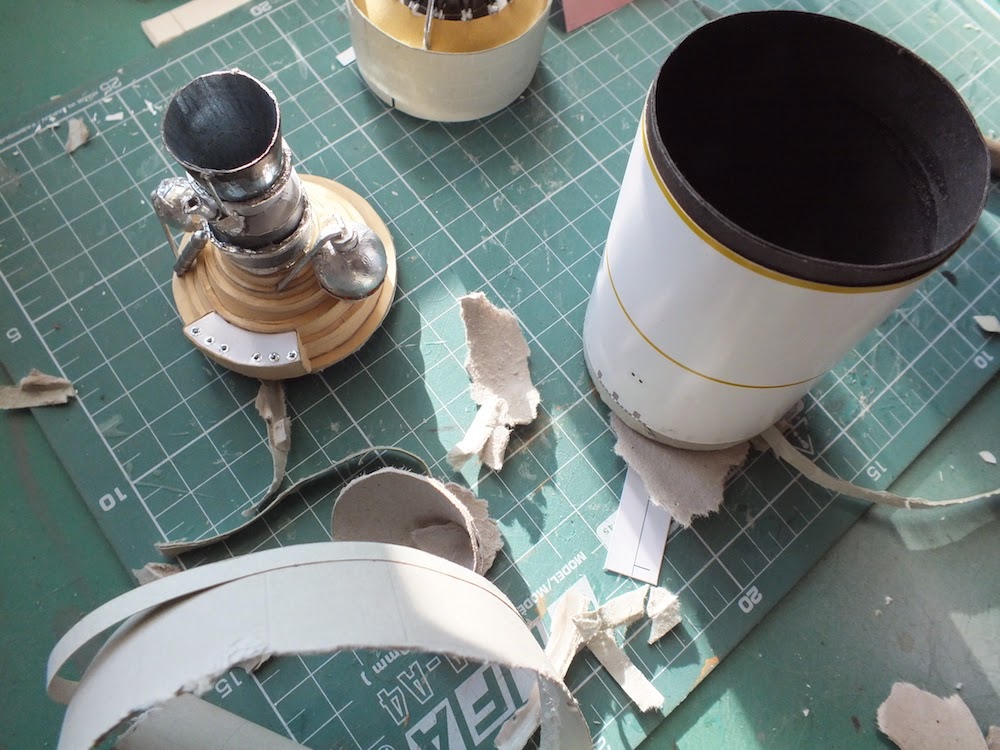
So, this is how it all started. Making the tank dome of the first stage.


The Blok A stage was 17 meters at its widest point. The Saturn V 'only' measured 10 meters. And while the Saturn used almost all available space inside its hull, the N-1 actually was quite uneconomical. The fuel and oxidiser tanks were ball-shaped, which meant that there was a lot of unused room left in the insides of the stages.

The vents on top are edge glued and that all goes reasonably well, keeping in mind that the whole model is printed by a copier, so it's a toner surface we're dealing with here.

Now, more of this after the jump.

28 November 2015

Ariane 5 1/96, pt. 25 - the fairing [4] - Finished!

Yes! Finally PK has made a good cone and now the Ariane 5 is finished. That is, it is now complete and can take its place between its brethren on the shelf. I still need to make the "half open fairing" and that will come some day but for now I just am glad the rocket is complete. The new cone of my own design is looking good, even though I now have more seams running over it than the original three- piece cone. This one has the right curve.
So, here are some pictures. Hopefully you like them. Thanks for bearing with me and having the patience during the long wait this year. Next build already has begun so shortly some progress on that one. For now, here's the Ariane 5 with Herschel and Planck under its fairing.


Room made for next project. Not sure whether it will fit there..

25 November 2015

Ariane 5 1/96, pt. 24 - the fairing [3]

Getting quite busy on the rocket shelf.
Well, that was something, the past days. Hours of work and thinking down the drain. At least, for a great deal. The Ariane is on the shelf now, together with its peers. But I am not happy with it. Everything below the fairing looks wonderful to me. It's precise, tightly fitting and unblemished. It looks very close to perfect to me. So a fairing with very visible seams and a bad fit is not the crown on this job. And this is a bad faring ogive. The parts of Mark Cable which are taking up the top part are great, but the transition between his top and the cylindrical part of the fairing sucks. I redid it five or six times but I couldn't get the measurements just right. I finally took the one that looked the least bad and used it in the ogive. But the cone is crooked. It is not elegantly curved. Grmbl.

Grmbl.
It kept on lingering through my mind, while I was taking a walk through the park this afternoon with my girlfriend. It has to be done differently. It needs to be good looking. I haven't spent that much time on the rest of this build to leave it there with a messed-up fairing.

So I started thinking the unthinkable, at least, unthinkable for me. 

[more after the jump]

24 November 2015

Ariane 5 1/96, pt. 23 - the fairing [2]

Okay...
Bear with me.
It is not going according to plan. Sometimes things don't work out as brilliantly as you want them to be. The curved paper stuff went very well but the closure of the two halves was bad. Wobbly, not nice and straight. I was very disappointed but I want to have this rocket finished.

I have decided to go for plan B. (which I made up after plan A failed. I never make a plan B beforehand...)

For shelf storage, there will be a one-piece fairing. Just a cylinder with a cone on top. It will come off by just raising it carefully. For display, one half fairing will replace that cylinder. This one also will have the sound suppression inside.

At the moment, I have tons of troubles with the full cone. It just don't fit and I am wasting sheet after sheet of silk matte photo paper. Even after tests with regular paper it just keeps going wrong. For today, I'm calling it quits. I an only handle so much setbacks...
More (hopefully) pretty soon! And with some pictures.

-PK

21 November 2015

Ariane 5 1/96, pt. 22 - the fairing [1]


Two halves of the straight part of the fairing, with the second stage of the Ariane 5
So, it's time to get back to the Ariane 5! I left the project when I was trying to make the final part of the build; the fairing. I wanted it to be separable and yet it still had to look realistic. So, tongue and groove style, with a black inside with sound suppressors, a sturdy layer in between, providing tongue and grooves and an outer layer in semi-gloss white. My first efforts stranded when the outside layer came out all buckled and misshapen. It had to be done differently.

The new plan was to shape the three-layered shroud by wetting the two inside layers of card and rolling it around a mould to dry and fixate the shape. The outer layer, made from photo paper, will be glued as the last part. It all needs to be quite exact and fitting. That's why I shoved it aside for so long.
Yesterday I wetted the paper and let it take shape around the moulds. That came out surprisingly well. Yesterday, I joined them with glue and put them back on the moulds for curing. Now it's the time for the result.

For the time being I made a crude quick fairing, to give myself an idea on size and shape. It turned out I really disliked the pointy top. So that needed some extra attention, too. And well, uh, looking at the Vinci engine (the one that powers the 2nd stage) I wasn't that happy either with its looks. Too straight a cone to be an actual engine exhaust. So lots of things to do!

The rest of the story after the jump.

11 November 2015

Three more.

I am getting back on track. Slowly but surely. And I really like making these little planes. It's  not about pressure, no intentions to make them top notch super clean and competition-worthy models, it's just about having a bit of fun, messing about with Xacto and glue, enjoying making a little old plane out of a sheet of paper.
Fabrizio Prudenziati's models are just the right thing for this. Nice and simple and fun to do. 
However, I slowly am getting more detail in them, too. The last one I did, the British SE5, had a two-sided, 2D Lewis gun on a Foster mount on top of the upper wing. I wanted to make it more of a 3D thing, so I scratch built a new one. The German DR.I is the one the infamous Red Baron flew, Manfred von Richthofen. This one was fun to make, too, with its little engine parts protruding from underneath the cowling. The props and wheels of all the planes are able to rotate. The Sopwith Camel, the third new plane, is also a British aircraft. In this one, the engine is clearly visible. It had two machine guns that shot through the line of the propeller, but were 'tuned' not to fire when there was a blade in front of the barrels. It made the aiming easier but the amount of bullets fired was smaller. The SE5 with its Lewis gun on top could fire over the propeller's diameter but the pilot had to operate the gun with a cable that was attached to the trigger. He could reload the gun's ammunition drum, however, by pulling it down on the rail.

There isn't really a lot more I want to share at the moment, so I suggest you just take a look at the planes. More details after the jump.


27 October 2015

Yes, Here I am. Still here, and not yet fully back either.


These pretty little planes were designed by the late Fabrizio Prudenziati, a very talented model designer from Italy, who passed away in april 2014. The planes were a real joy to put together. Nice and simple yet very nicely detailed, delicate and very well fitting design. I did these three almost in one go. There are more to come. At least one of von Richthofen’s legendary Fokker Dr1 Dreideckers, but also some British WW1 planes and maybe others, too. It looks like PK is back. But is he?

Today, your Paper Kosmonaut has turned 45. (Yeah, thanks.) I’ll get over it in the end. Luckily I still look quite okay. A destinguished grey hair here and there in my whiskers.
And with these little planes it appears like I'm coming up to steam again making paper models.
But in fact, I'm not, really. There still is too much happening outside the paper world.
Main reason is my dear GF, who isn't really back to her fine healthy self yet. And before she is, I am afraid I won’t or can’t  do anything big and papery any time soon. I just don’t have the time. I just don't have the inspiration.

But these little ones, those well-designed planes of Zio, yes. That I can do. They maintain my finger skills a little, I enjoy the tinkering with wings, props and even strings. There will be some more of Zio's planes to come. Maybe I'll turn them into a big mobile. A big aerial dogfight in the hobby room. Who knows.

More pics after the jump.
Thanks for keeping in touch, thanks for your patience. There will be more and better and bigger stuff again, just wait.

--PK

26 September 2015

Still here - but not any thing to show

Work, work, work, I had to work on a film assignment with a strict deadline the last couple of  weeks. Luckily I finished it this week and hopefully I will have some more time on my hands again to start doing some paper work. Ariane 5 still awaits its shroud and I want to do lots more models. I have a list, you know.
At the moment I actually am doing some model stuff but it is in plastic. I'll show you when it's finished. It's a what-if version of the beautiful TSR2 in 1/48. Incredibly inaccurate model, the Airfix one, but since it is a what-if with some additions of my own, it doesn't really matter.

I have had a busload of things on my mind the past months and this year is a tough cookie. Unfortunately the first thing that suffers in such situations is your spare time, the hobby and your overall rest. So that is why there is so little to show you the time being.
It all will change again, there will be new stuff built, but it all will have to wait for a later date. Hopefully still somewhere this year, but bear with me and check in now and then, I promise you there will be a revival. But I cannot force it into being. So, be patient. I'll return.
--PK

14 August 2015

Another update

Hi people,
As much as I want to do some paperwork, I find myself unable to do so. I have a lot going on with my work on a film which is due to be shown on TV in early October, spending time with my recovering GF and just doing nothing to keep my mind on track and staying healthy.
Really, I desperately do want to get back to the cutting mat but I just can't seem to find the time and the energy to so so. It will come back and I know I don't owe any of you an explanation of why I am absent for this time but sometimes real life just takes over the one PK lives on the interwebs.
I hope you all hang in there and check from time to time to see whether I have picked up the Xacto again. For now I have to sign off with nothing but a wave and a cordial "see you soon".
--PK

20 July 2015

Another update

Hi people.
Just to let you know that I am about to tackle the Ariane shroud again.
And that I have updated the gallery.
It now has pictures of almost all of my finished models as well as links to the original build stories.
Just so that you know. Enjoy the loooooooooong scroll down.
--PK

14 July 2015

Update

Hi people.

Not that I owe you all any explanation for my absence, but here is one anyway.

Lately I am occupied with lots of job-related things and taking care of my sweet girlfriend who needs me to improve on her health again. She improves a little every day but it will take a lot of time until she's better. 
Both the job and the nursery stuff take up lots of time so that puts the paper model things on a low priority level, unfortunately.
I occasionally do some paper stuff but not a lot. Most of the time I just don't feel like it. And that's why although this year started out quite prolific, it now came to an almost grinding halt.

How's stuff then, now?
Well, I have built some more Johan Scherft birds. I did another version of the wren after I made the starling and I recently finished the goldcrest. So now I have quite an aviary on my shelves. For the birds I chose to use 120 g/m2 paper because I find the advised 80 g/m2 too thin. But that's just me. The wren was slightly modified, too, because I opened its little beak so now it sings. The older version was put on a small branch inside a display case and I gave it to my mum, who loved it. So it got a good home.

The Ariane awaits finishing too, of course. I did the cylindrical part of the fairing weeks ago.  I wanted to improve the two halves over all the previous attempts with splitting shrouds I tried over the years.
So I tried a tongue and groove connection by putting an extra layer between the inner and outer wall. It looked great, it worked like a charm. it was on a hot day when I made it and while the idea worked great, it dried up totally wrong. I took the mould away too soon, I guess. The end result was totally unusable. I haven't got myself making it again.

The tongue part of the shroud half. Some more pictures after the jump. 
I have to say, I like the abstractness of the photo. (-:

20 June 2015

Birds.

The Ariane still awaits its shroud. I felt like making a bird. I like birds. A lot. So that's why I also make bird models. Here are Johan Scherft's Starling (De Spreeuw) which I bought via Zeist Bouwplaten (Diderick A. den Bakker's webshop) and also Johan Scherft's Wren (Winterkoninkje) which is downloadable from Johan Scherft's website, just like a couple of other birds. Do try them. They're lovely to make.
Both went together very easily. I modified both a little. More of the story below.


13 June 2015

Still Here

...But having a bit of a holiday-ish time at the moment.
Ariane is awaiting its shroud, there's a partially built starling on the desk and the sun is out.
I am enjoying the weather and the company of my awesome girlfriend.
In about a week or so I am back at the cutting mat.
Until then, go outside, have a beer or a nice cold white wine, enjoy the weather, each other, and have fun.
See you in a bit.
--PK

25 May 2015

Ariane 5 1/96, pt. 21 - the EAPs [part 7]

The EAPs are done. Now proudly strutting their stuff. (No pun intended. Oh well, it actually was. Of course. Struts, strutting, oh my, what a weak attempt to be funny. I could hit myself.)
The lower struts were nice to make. Just lots of fitting and refitting but there you go, that is scratch building. 
The top attachment points of the EAPs were a little harder. I designed them myself by just looking at the couple of drawings and pictures I had on which the contraptions were shown. It looks like they do the trick but I am sure there are some errors in them. But they certainly look more like the real thing than the stuff the models themselves provide.

So here's a shot of where I am now in the build, after the jump more pictures. On to the fairing!


21 May 2015

20 May 2015

Ariane 5 1/96, pt. 19 - the EAPs [part 5]

There they are. Two identical booster rockets, ready to go. I still need to do the attachment system but I consider that a separate job, since it concerns both the boosters and the core stage. The second one was there within a day. It all was going very fast, having made these stove pipes four times now. I really am glad with how they came out.
Up next is the tedious work of the shroud or fairing that conceals the two satellites from view and protects them on their way up. It will be removable, and in two parts. So there will be more magnets involved, I presume.
More pictures of the EAPs after the jump.


16 May 2015

Ariane 5 1/96, pt. 18 - the EAPs [part 4]

Almost back where I left off.
The first EAP is finished again. It already has the engine back on and stands tall, awaiting its twin.
There hasn't been an engine glued to the stove pipe here on this photo but in the time between I took this photo and I wrote these lines I did attach the engine and the retro rockets on the skirt.
After the jump more pictures of the rebuild.

07 May 2015

Ariane 5 1/96, pt. 16 - the EAPs [part 2]

We're getting somewhere. The first EAP is almost finished. The only thing left to do is making the struts which attach the booster to the core stage.
Lots of the work done the past few days is scratch built stuff. The first tube now has its greeblies and all the protrusions it also has in real life.

More after the jump. As usual.

02 May 2015

Ariane 5 1/96, pt. 15 - the EAPs

Étage d'Acceleration à Poudre. Acceleration stage on powder. How poetic a name for just a long stove pipe that acts like a giant Roman candle. But that is what I have started working on now.

Eventually, I just cut out the hull, rolled it into a small tube and put it aside to more or less set. But as usual when I am working on a model I started to notice incorrect parts and shapes. So I needed to redo them.
More on that after the jump.

22 April 2015

Ariane 5 1/96, pt.14: Herschel ready for stacking

As the title already implies, Herschel has been finished. The last parts were also a lot of fun. Again, my little box of pins was used and a dozen or so of pins was sacrificed into this model.
Here's the result, on my hand. The making of is after the jump. Have a look, if you will.


18 April 2015

Ariane 5 1/96, pt.13

And on we go with building Herschel. I made some progress in the build, but it goes slowly. And I know why: I enjoy it. A year or so ago I also made an attempt to make the two  telescopes but in 1/48th, the scale in which I usually make satellites and probes. But it just wouldn't go. I think it partially has something to do with the fact that I just like building small. And this is fun.

Last time I left you with the finished service module. This time, I am as far as the photo below. More of the build after the jump.

Here you see my big hand holding the service module with the cryostat vessel on top, which was detailed with some plumbing and wiring.

12 April 2015

Ariane 5 1/96, pt.12

So, Planck is done. Was it? No, not entirely, actually. I still had to make the small brackets that connected the Service Module bus to the solar panel shield. So I did. You can see photos of it after the jump.
I also started work on Herschel. This build is completely based on John Jogerst's model, which you can find in Jon Leslie's Lower Hudson paper model collection. However, I don't use the model's parts themselves but cut them out of coloured paper and add a lot of scratch built parts in the process. The photo below shows where I am now and how I got there is shown after the jump. 


05 April 2015

Ariane 5 1/96, pt.11

The slight return of PK.
Got a new pair of glasses and I got my trusty old LX7 camera back from repairs that apparently had to take three months. Luckily it all was covered by the warranty. My new specs unfortunately weren't. oh well. Where were we?
Oh yes! Planck!

It's finished. Isn't that great? The story's after the jump. Here's Planck, posing on top of its SYLDA shroud.

27 March 2015

Short update

Still here, not to worry.
I just had some quite disrupting stuff happening the last few weeks, that made me shift my attention away from paper and model making. One of the things was that my bag was stolen, with all my keys, wallet and reading glasses inside. The whole situation has put me back about 500 euros of getting all my stuff back together Changing locks, new driver's license, you name it. Great. Fantastic. 
But because of the loss of my glasses I wasn't able to do any paper stuff at all. Now I have a new pair and I can continue the build of the Ariane. Soon an update will appear here at this very place!
For now, have fun and a good weekend.
--PK

10 March 2015

Ariane 5 1/96, pt.10

There was a moment on which I thought I couldn't get it right. But then I thought I also have made Voyager in this very same scale. So why not Planck?
So I tried.
It al still is in a state of further development but the base is there.
More pics after the jump.

05 March 2015

Ariane 5 1/96, pt.9

A little bit of building has been done today! Hurray!
I have been busy with all kind of private and job-related stuff because I indeed appear to have a life outside being Paper Kosmonaut. That happens. Well, enough chit chat. What has been done, PK?

Well, I started a little on Planck, one of the two space telescopes on board of the Ariane and I further detailed the second stage. Here is a photo of the second stage as it is now. 


More after the jump.


22 February 2015

Ariane 5 1/96, pt.8

So I finally had some time on my hands again to build some stuff.
Picking up where I left, I continued the build of the Ariane with SYLDA, the container structure that enables the launcher to take two items up into space. In the case of V188, (vol 188, the flight number of the Ariane) the payload was Planck and Herschel. Two smart space telescopes that were placed in  L2 to make observations of distant galaxies and the origins of the universe. About these intriguing L-numbers around Earth's orbit I will perhaps write another time.
SYLDA (SYstème de Lancement Double Ariane - Ariane Double Launch System) is just a cylindrical shape with a cone on which there is a second adapter ring to accommodate the second payload. The build I am doing is a combination of say, 80% scratch built stuff and 20% of the rocket model made by Ton Noteboom and the derivative redesigned by David Brown. SYLDA is part of the Brown model but it only has one height and it's the large 6m one while V188 had the 5 meter SYLDA. I measured the original kit version and concluded it was off scale. I took the original measurements and made one myself out of glossy black card. The additions were made by aluminium tape and some thread. The inside was reinforced with matte black card. It fits snugly into the 2nd stage.
The second stage itself also was quickly redone when I felt the need to change the insides of it. The only original piece left is the engine section.
Here's one picture, some more after the jump.


14 February 2015

Ariane 5 1/96, pt. 7

This is what I had made of Planck already, a little more than a year ago. in 1/48. I hope I will one day finish it. I like the looks, I haven't seen it since I put it aside all those months ago.

It will be nice to try and build this one and Herschel in half this scale.
some more news after the jump.

07 February 2015

Ariane 5 1/96, pt. 6

Almost done with the central core of the Ariane.
Now all the fuel lines and electrical ducts are there. Today was a lot of micro- modelling. 
Little blocks and bands for the piping.


06 February 2015

Ariane 5 1/96, pt. 5

What do you do when you suddenly realise the alignment of your model is not correct? And that that seam easily could have been hidden behind a electric cable duct?
You start ripping your pretty model apart. That's what you do.


What the results are, you can see after the jump.

02 February 2015

Ariane 5 1/96, pt. 4

Whichever model I make, a lot of research and drawing comes along with it. It's inevitable. It is half of the fun, too. I like researching my subjects to know what was happening and how things worked.
Now this model I am working on now, the Ariane, is no exception. Sometimes it is hard to find photos of good quality of the details I want to see to get stuff right. In this case, the upper stage is the issue. I have found some stuff in the end, but it took some thorough searching. There are enough cutaways and exploded views of the hardware but a separate photo of the second stage of this rocket, nowhere. Well, at least not hi-res. But I found enough to work with in the end.

Further, I do a lot of drawing of my subject. It helps me to understand the dimensions and scale, and to imagine the mode in 3D. I always have a sketchbook at hand, even when I am travelling. In this case, I also use it a lot for drawing this rocket. I thought it would be fun to show you some of my doodles.

First, here is where I am with the Ariane now. Sketches and more after the jump.


The engine and bottom section of the second stage of the Ariane 5 ECA


25 January 2015

Ariane 5 1/96, pt. 3

What is that saying they use when things go slowly but surely? Steady as she goes? Well, anyway, that's how it goes at the moment.
Small parts, small progress but progress there is.


21 January 2015

Ariane 5 1/96, pt. 2

Well, lots to do here. As usual. Busy with getting our films shown elsewhere. Sometimes there's a little moment I can get some glue on a piece of paper. Last week I hardly did any work on the Ariane but I managed to do the pressure balls at the engine section of the first stage.
These are the second version, by the way. I first made them from styrofoam balls to keep it light. I wrapped aluminium tape around  but found the wrinkles of the result too coarse. So I took them off and replaced the bigger one for a marble, about the right size. The smaller one is a glass bead.
Up next is the fuel lines and further detailing. I still need to look for good photos of the booster attachments. They are a lot more complicated in structure than the models imply.
Ton Noteboom's model is a good starting point and David Brown's remake is, albeit simpler, more expanded in model updates and parts. Both have their shortcomings in detail, however. Or It's just me wanting to have my models more detailed.
Anyways.
Below you can see a photo of how the Ariane is looking at the moment. After the jump there are some more pictures of the business end.


10 January 2015

Ariane 5 1/96, pt. 1

I realised that, apart from a very ancient little rocket, I didn't have any European rocket in my stable. So I decided to do one. And then of course the biggest one. Ariane 5.
Here's where I am now, more pics below.


03 January 2015

Sikorsky S-38 Osa's Ark 1/100 (Fiddler's Green)

I took the days between boxing day and today for an inbetweenie. 
Osa's Ark was a Sikorsky S-38 amphibious plane that belonged to adventurers and documentary filmers Martin and Osa Johnson. They both had pilot's licenses and flew with this aircraft in Africa in the 1930s. They also had an S-39, which looked pretty much the same but with just one engine in the middle. Oh, and it had a giraffe paint job.
Anyway, it's a plane I'd really like to have myself. Very versatile, because you can land it on both water and runways, easy to reach engines, aesthetically very pleasing and good to use for holidays. Pity that there are just a few left. These types should be revived, I think. I know I'd buy one if I had the money.

Here's one photo, some more after the jump.
Oh, and happy New Year!