byline

Paper models, photos and musings of a Paper Kosmonaut

21 June 2011

On the other hand....

It is kind of fun messing around with styrene again now and then...
I mean, when do you get to sand off paper? (-;
(click for bigger)

20 June 2011

Juno (2)

This is going to take longer than I thought it would.
As I planned to take this model to a higher level of detail I could not foresee there would be this much work in it. I like it a lot though, I learn a lot and that's one of the things that keeps me going.
I decided to completely redo the solar panels. I wasn't happy with just darkening the provided ones. The real stuff is almost pitch black but it has a slight hint of red in it. All solar cells have two red corners, one row on the left, the next on the right, which gives them a very distinguishable pattern. I took on the challenge and first designed just one solar cell. Next, I put a lot of copies together in a row, picked a photograph of the panels and started counting. Rows, red lines, electrical circuitry, I guess it took me one whole day to get where I am now. From this:


to this:

with a layer of clear gloss over it, I'm sure it will look wonderful. 

Next was the engine section, of which there was none in the original model. I guess there wasn't a lot of detailed imagery around when Yogi started working on his model. Besides, I know he wanted to keep it simple. 

Only recently more and more pictures started to show up with more details and Nasa launched a site called "Eyes on the Solar System" (works fine in Safari but has a nasty glitch in FF) where one can see Juno from all angles possible, including the engine. So I started my first little steps into actually designing a part of a model. (not taken into account I sometimes have made additional stuff from already designed parts)
There I ran into a problem I still haven't solved. For a first time design it is going quite well
but my maths is, to say the least, bad. And I need some cone shaped parts. And that is not simply achieved by taking a circle and cutting and folding it into itself.
They all seem to lean a bit to one side. Still got to tackle that problem. I would really like to get Yogi involved in this thing so I sent him an email. Hopefully he responds soon.

I had some very nice distractions in modelling last weekend but I am afraid that needs to be kept secret for some time.

In the meantime while designing I wanted to get some modelling done so I made a printout of a Mil-Mi-9 and the Fakestok, all in 1/144. (reduced from 1/48) later on this week I might start on that. I also am working on a (very very badly molded) 1/72 DH-88 from Airfix. But that is polystyrene and is thus not relevant for this blog.

Hopefully next time some more progress.

13 June 2011

Juno (1)

The next building project will be Juno, a big probe headed for Jupiter. Unique, because it is the first probe to the outer planets (the inner planets being Mercury, Venus, Earth and Mars) without the aid of an RTG, a Radio-isotope Thermo-electric Generator. In other words a kind of small nuclear reactor that provides the probe of energy on its long flight. Such devises ar not only very expensive and dangerous to assemble but also a probable pollution source if it would crash on one of Jupiter's moons, say Europa for example.
Scientists have reason to believe that under Europa's thick layer of ice there might be a sea in which life could develop or already has developed. We wouldn't want to start messing up on some other world too, now would we?
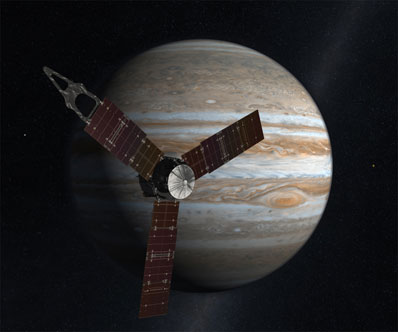
©NASA

So Juno is equipped with huge solar panels. While rotating on its Y axis (north-south) the solar panels will sway round like windmill blades. Juno will describe very large elliptical orbits around Jupiter while looking at its gravity field, its magnetic field and the magnetosphere. Also, Juno will look in to the reason why the atmosphere of the biggest planet in our solar system creates all those neat ring-like bands of clouds and gases. 
This research will continue until Jupiter has been completely scanned. This will take 32 orbits during six years after which Juno will be sent into Jupiters thick gassy atmosphere and burn up. Jupiter has no core and consists solely out of dense gases. Juno won't do any harm in there.

©NASA

John Jogerst, alias Yogi, an avid paper modeler and designer has made a very nice model of Juno a while ago. he based his drawings on the photographs available and came up with a model which is very good for educational purposes but lacks a little in detail, in my very humble opinion.
I decided to take on a more detailed build and with some extra information I gained a lot of new pictures and facts.
Juno's solar panels in construction
©NASA

The first thing I did was changing the colour of the solar panels. They aren't blue but almost jet black. I changed Yogi's model but I still am thinking of completely redoing them. The backside is matte aluminium with small electrical silvery lines over them. As a finish the front side of the panels will be treated with a thick layer of gloss paint.
The core part is a hexagon with open sides and insulating foil around it. The HGA (High Gain Antenna) dish on top also is clad in foil. So there will be non-paper involved in this build. On top of the hexagon there are several instruments and a big dish for communication with home.

 Juno without its foil upholstery.
©NASA

So first there will be some more detailing in the design before printout and assembly. Scale will be 1/48 so it fits nicely next to my beautiful Voyager model I made half a year ago.


Voyager in 1/48 with a same scale Voskhod next to it. A big probe! Juno will be in the same league. I really hope Juno comes out just as nice as this one, I still consider Voyager one of the best, if not thee best model I've made.

Build starts soon!


STS - 1 Finished!

Well, the job is done. 
Apart from the thick-paper-issue I always have (Well why don't I use thinner paper then? You tell me!) This build was easy and an enjoying experience.
Last night I redid the base of the diorama by scratching some lines into the sides of the slope because it wasn't concrete-like enough in my eyes. I saw in a photo LC39 was made of thick concrete slabs and I tried to imitate that. It might look quite exaggerated but it certainly looks like stone or concrete now instead of sand.

All the steering rods were made of brass wire, easier and the same result. (I said it before, I say it again, I am no purist.) A dab of paint finished the look.


Last was the coming together on the diorama base.
Here's some pictures.


Up next is something different: The soon-to-be-launched Jupiter probe named Juno.

STS - 1 (continued)

Some progress has been made. Real life kicked in and while I would love to have STS-1 quickly finished to get to work on new models, I obviously also have to do my job. Perhaps some of that another time.

I finished the biggest part of the Crawler. I only need to do the walkways along the four sides.
I was amazing how easy everything came together. Alfonso makes models that are well designed and easily reduced in scale.

Biggest issue was the angle in which I had to put the four trucks in order to get the MLP level while the crawler climbs the 5ยบ slope to LC39A.
I used a transparent gel glue to give the trucks some time to adjust to their positions while hardening. After that I did the steering rods that put all the trucks in the right direction. When trying the crawler out for the first time in the late 60s,  they discovered that they couldn't just let the tracks steer the behemoth like a tank or a shovel. With such a delicate load it had to be more subtle.

 Okay, I smuggled. The rotating parts of the engine sections weren't paper cylinders but small pieces of cocktail sticks.

As almost usual, the thickness of the paper causes some displacement issues underneath the tracks. Since this part will be on the crawlerway and not visible, I don't give a flying hoot about this. Ha!
I did, however make the exhaust pipes and mufflers for some extra detail.

 Clearly seen here is the angle of the trucks in relation to the body. It looks kinda weird and maybe even a little grotesque but with the MLP on top it has exactly the good look. Besides...
The deck is completely level. As it should be.
Tomorrow I'll add some more pictures.