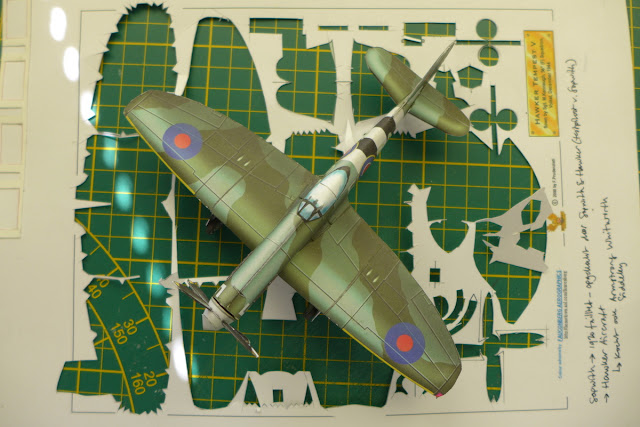
The Hawker Tempest is one of a family of planes all conceived in the early days of the Second World War. While the famous Hurricane was fighting in the Battle Of Britain, Hawker already worked on a more modern successor. The Tornado was the first one they tried, but it was abandoned. Then, the Typhoon came along which was better but had some disappointing characteristics at the start. The Tempest was a direct derivative of the Typhoon and in the hands of a good pilot it became a formidable fighter. The Typhoon also saw service, by the way.
The Tempest was equipped with a large Napier Sabre engine, which needed lots of cooling. For that purpose, a big radiator was placed under the nose, giving the plane an unusually large ‘chin’. But it also gave the plane its characteristic looks. There also was a version produced with a radial engine wich looks really sleek and much more like the very beautiful Hawker Sea Fury which actually was the plane the Tempest eventually evolved into.
This here is the end result, the build report is below, after the jump.
It is always fascinating to create a plane out of a flat piece of paper, I think. And Zio's planes are always a joy to build. They excel in colour, printed-on detail and i think the way Fabrizio Prudenziati coloured his planes give them a very nice hint of realism. It all is a little grainy, which enhances the feel of 'distance' to the object. (an 1/72 scale aircraft watched from one meter's distance, would be 72 meters away from you in reality. So the colours should be a little more dimmed for compensating. I think Zio's planes do a brilliant job in that way.)
 |
| I already started before I took the first photo. |
 |
| The cockpit however is a triumph, I think. Using some embossing balls, I could get the curvature and shape almost perfect. |
 |
| I added a small card circle former in front and cut off the sawtooth tabs because i wanted the propeller to be able to spin. |
 |
| Main ingredients: sewing pin, a couple of tiny beads and CA glue. |
 |
| Building up the prop. Edge glueing. I reinforced the roots of the propeller with some CA after I bend them into a curve. |
 |
| Et voilà. (note the vague but visible yellow ring.) |
 |
| Wheels. Again pictures online were my guidance here. |
 |
| Here she is, born out of one single sheet of white paper. Now it is time for some beauty shots. |
And that is that. A nice quickie. It has joined the Spitfires, Macchi's, Glosters of WW2 and the bunch of Zio's WW1 planes on the shelf.
Soon hopefully, I will be giving you the first build report of the New Shepard. I have to get some other things sorted out first.
Until then and thanks for stopping by,
--PK


No comments:
Post a Comment
attention spammers: all posts are moderated before placing.
you won't get through. you lose.